Deploy Angular App to CF with DevOps
Generating an Angular Application
First thing's first - before we can deploy an application, we first need to build one. For this we will be building an Angular 6 Application with the use of the Angular CLI. In order to do this we will need some prerequisites
Prerequisites
- Node.js
- NPM
- Git
- Familiarity with Git and GitHub
Building the App with the CLI
Open your Terminal/Powershell Application and navigate the directory in which you would like to create your application, then install the Anguar CLI
npm install -g @angular/cli
Thereafter we can build the Angular Starter app by using the Angular CLI as follows, I'm going to call my application DemoApp, but you can name yours whatever you like, just keep this in mind as you will need to reference your app's name when configuring your deployment directory
ng new DemoApp
If you are prompted to select options for your application select the ones you would like to use. This will create your application's files and install the required dependencies
Once that has been done you will see that the files for your application will have been placed in a newly created DemoApp Directory, next we can navigate into this directory with
cd DemoApp
Next we will jump into GitHub and set up a new repository
Setting up a GitHub Repo
Go the the GitHub website and log in
Once logged into GitHub create a new repository for the application with the following options, then click Create repository

Upon creating a new repository you will see the next screen with instructions on how to push your repository to GitHub
For our purposes we will do the following in the terminal from the DemoApp directory, note that you can get your repository URL from the GitHub Repository Page as shown above
git add .
git commit -m "first commit"
git remote add origin <YOUR REPOSITORY URL>
git push -u origin master
If you run into the 'git' is not recognised as an internal or external command you can download git here, then close and reopen your terminal and navigate back to your application
If you get a fatal: not a git repository error in your terminal, do the following instead
git init
git add .
git commit -m "first commit"
git remote add origin <YOUR REPOSITORY URL>
git push -u origin master
Once we have done that, we can refresh the GitHub page and see our code
Creating a DevOps Toolchain
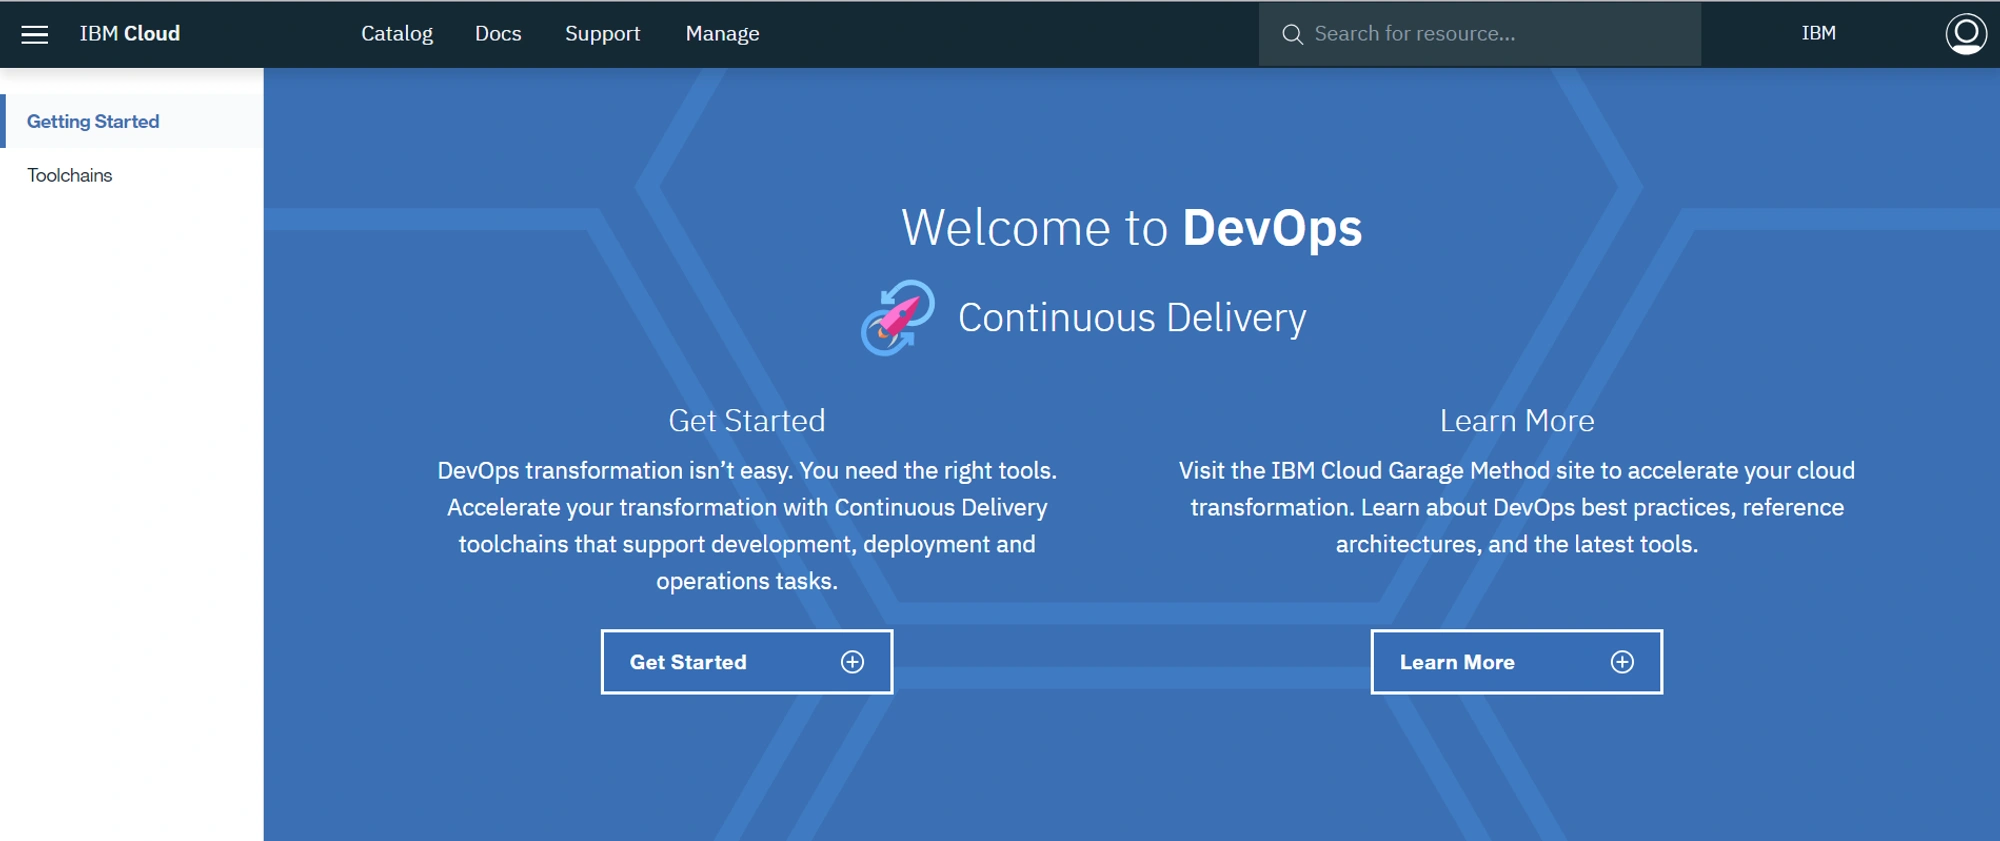
Next up we can log into IBM Cloud and navigate to DevOps from the hamburger menu at the top left

Once on DevOps we can navigate to the Getting Started page via the menu on the left and click on Get Started button on this screen
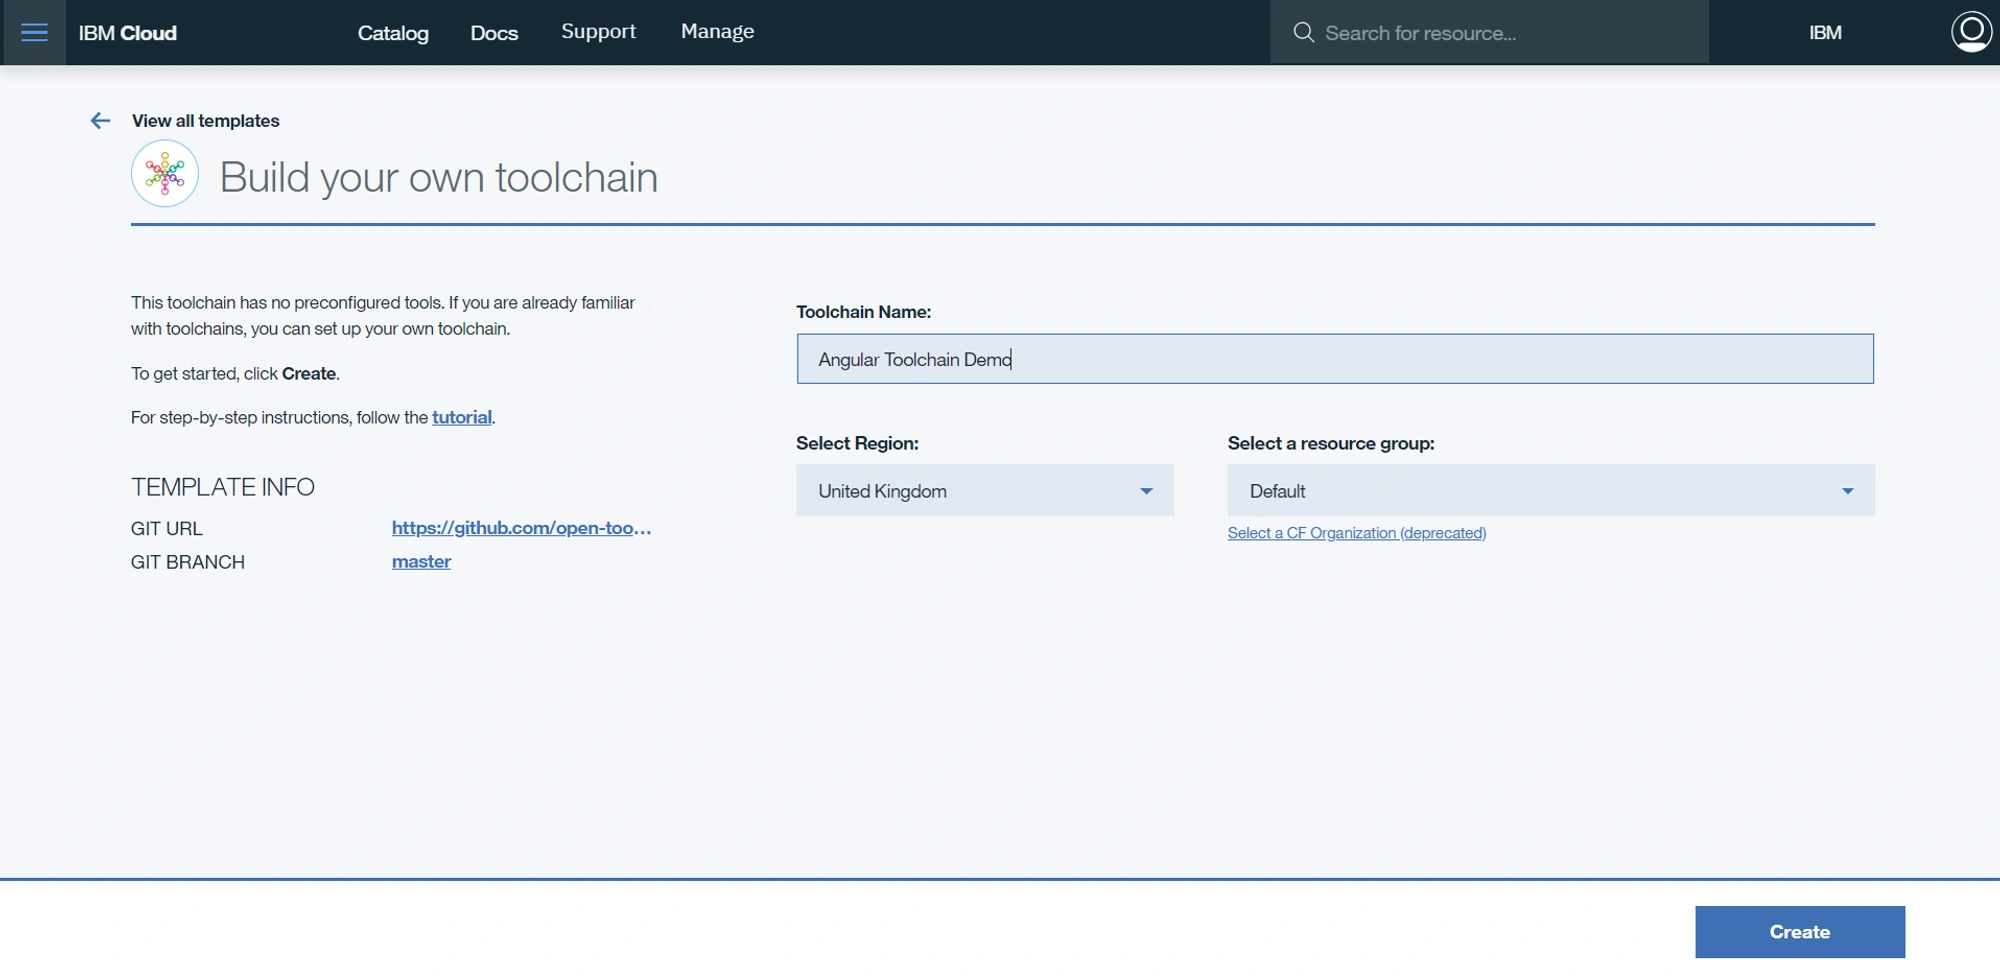
From here we can search for the Build your own toolchain template as shown below and click on the option shown below (note that the search is case sensitive)
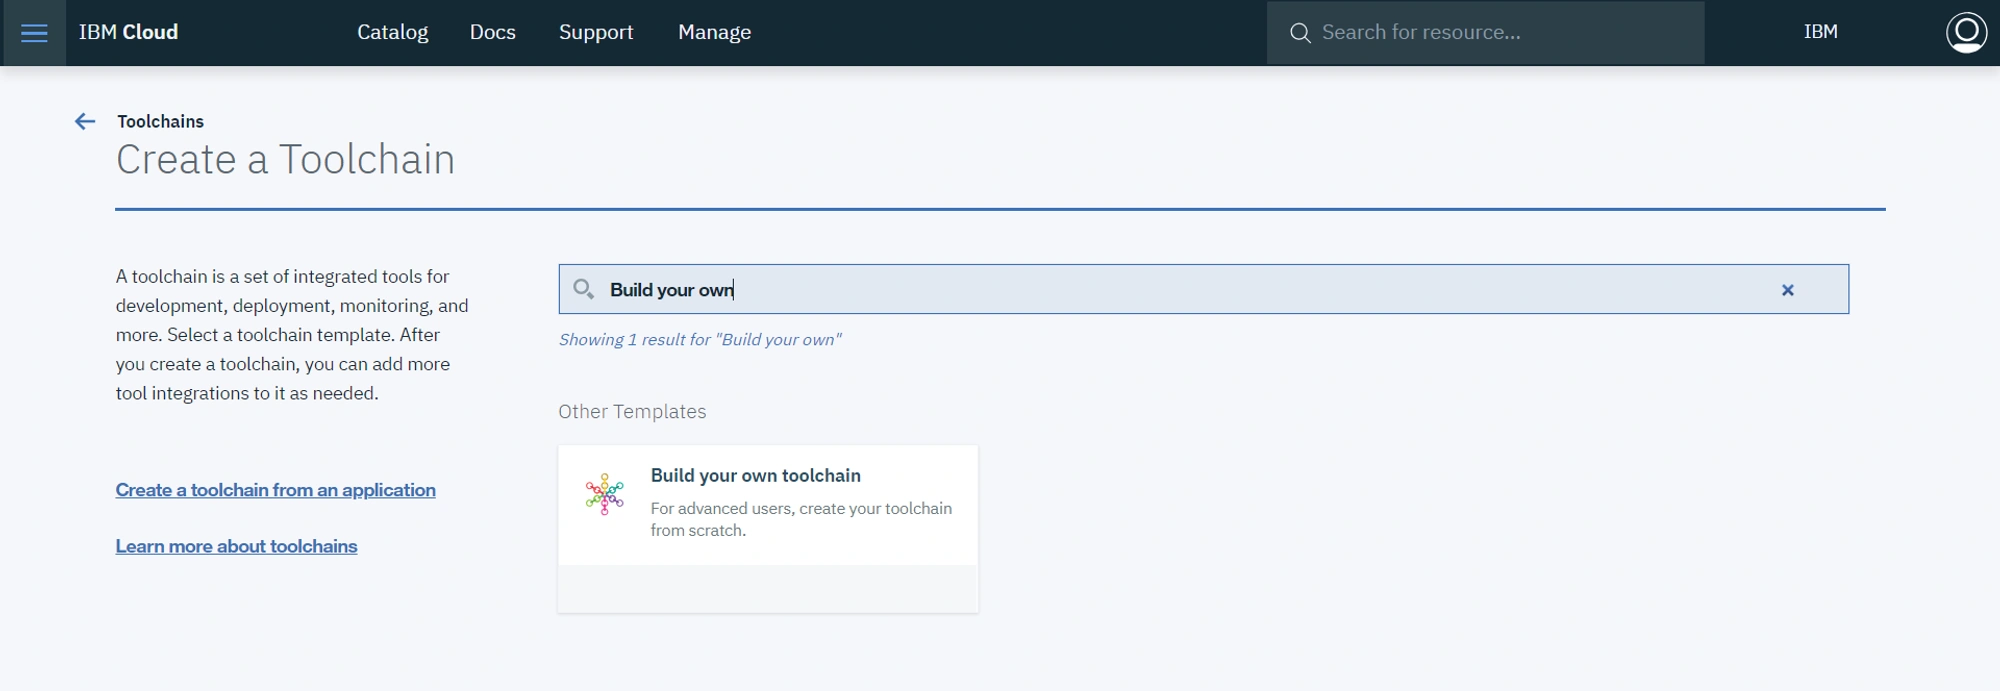
Then we name our Toolchain and select the Region, and finally click Create
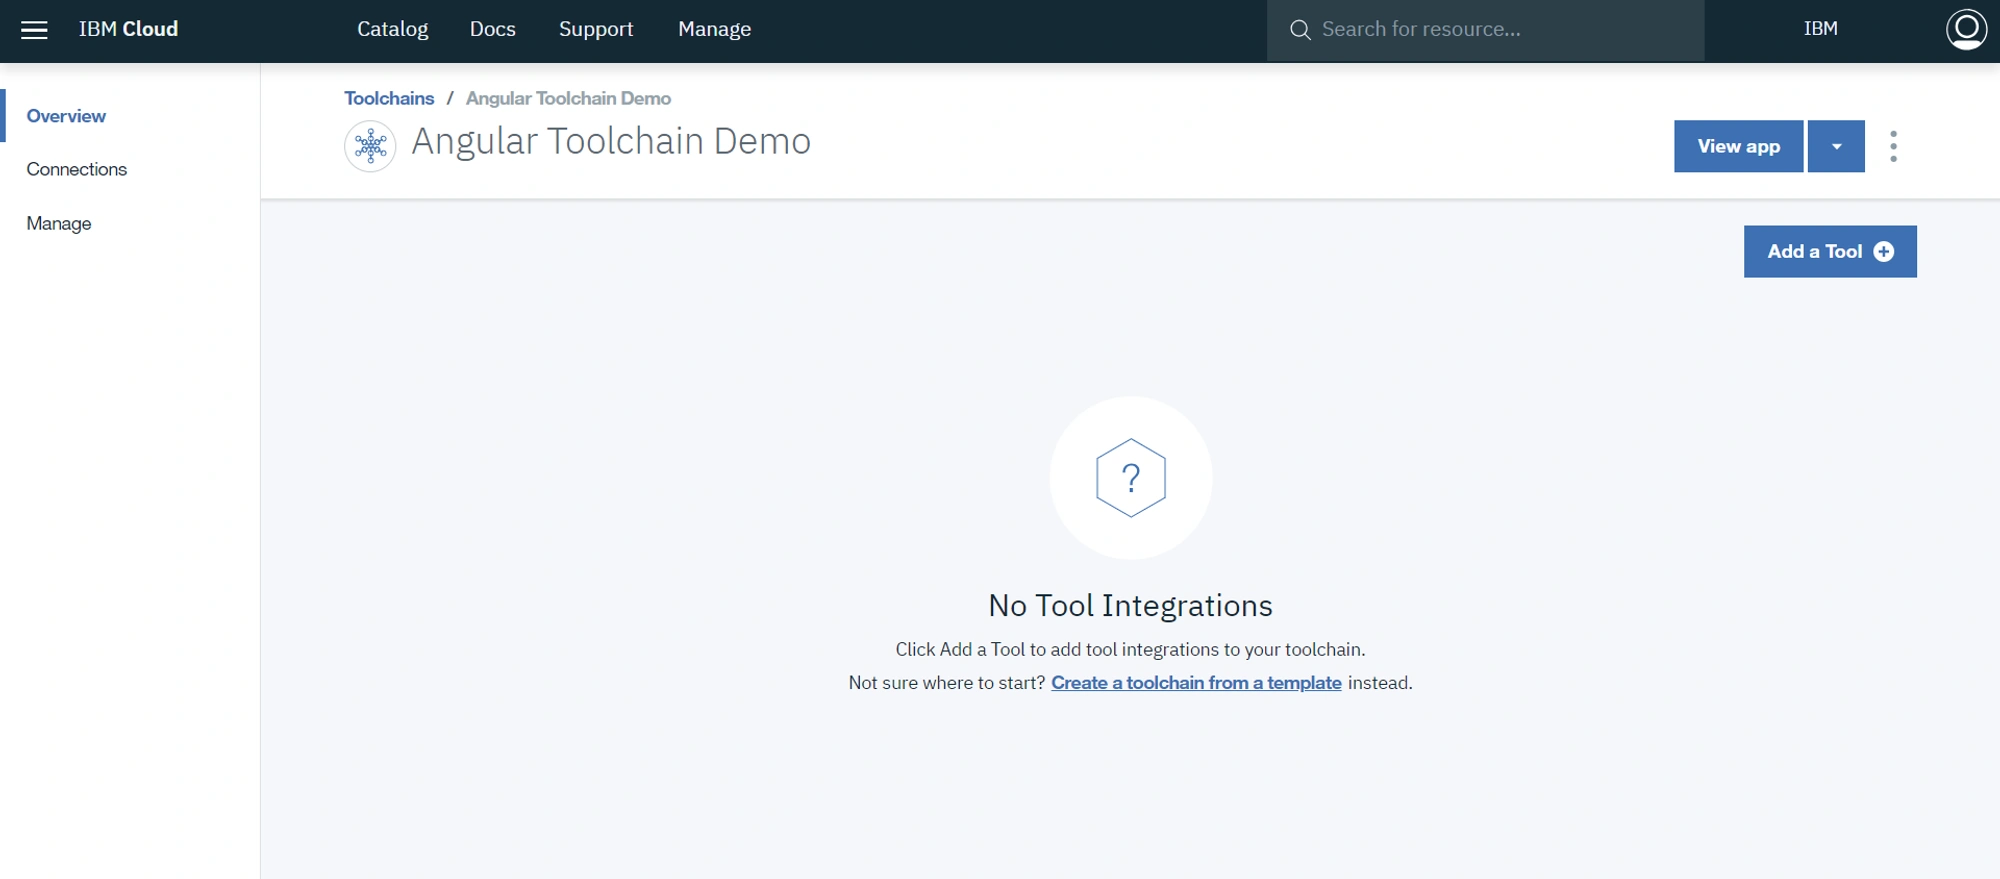
Once we've created our toolchain we will be directed to the toolchain overview which show us an overview of the different tool integrations we have within our toolchain. At the moment we do not have any, we can click on Add a Tool to add the GitHub integration which will pull our code from GitHub for use within our toolchain
Getting our Code from GitHub
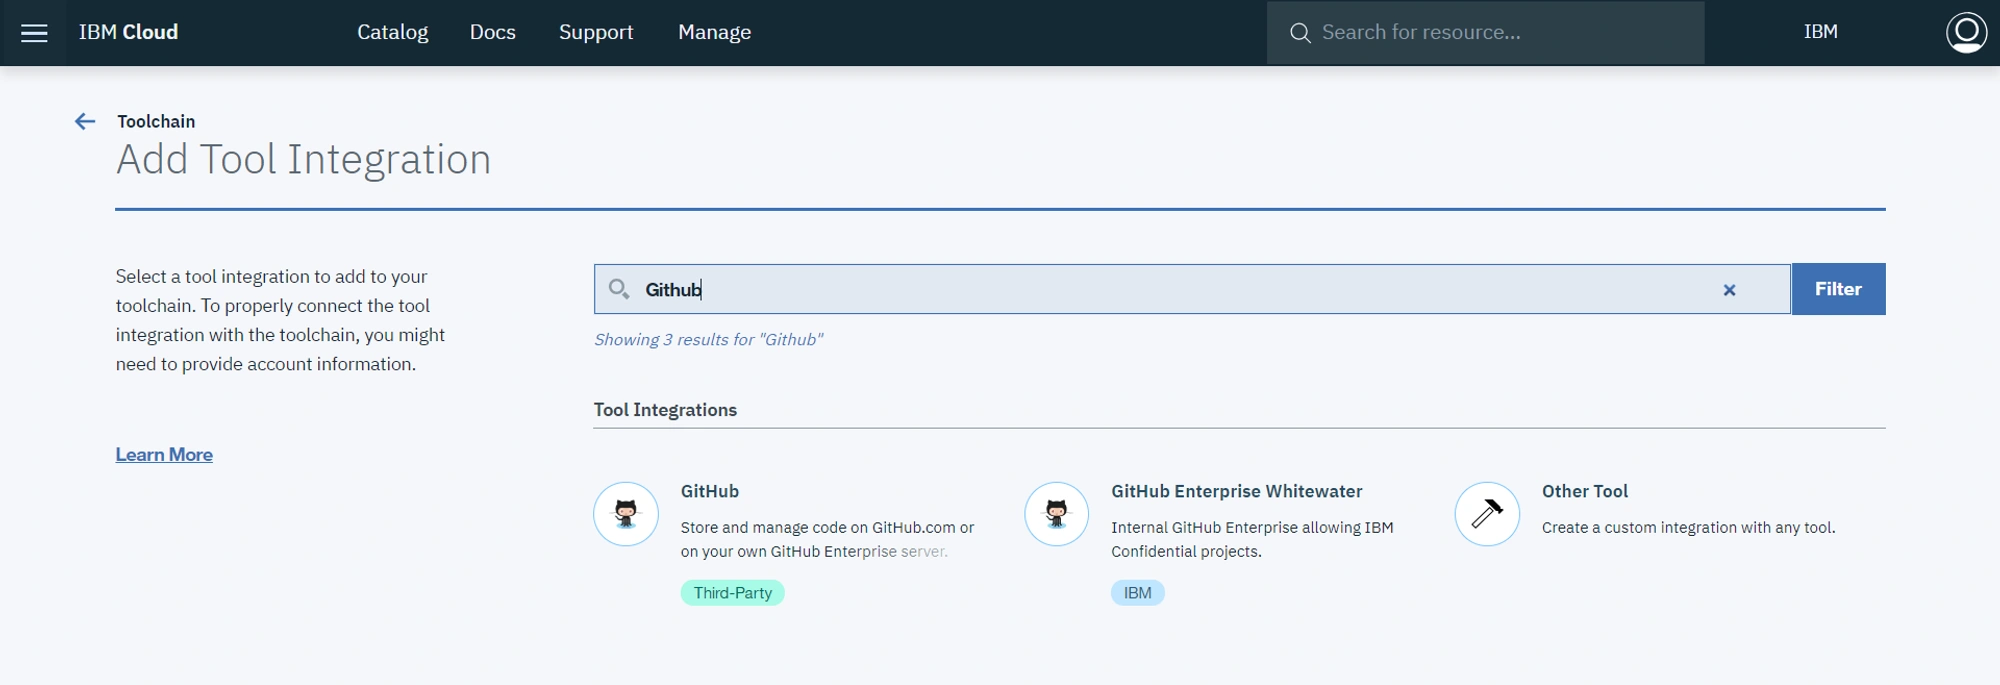
Once we are on the Add Tool Integration screen, we can search for GitHub and click on the GitHub Tool Integration
If you are prompted to Authorize this tool, click on the Authorize button and follow the instructions on the window that appears before moving on
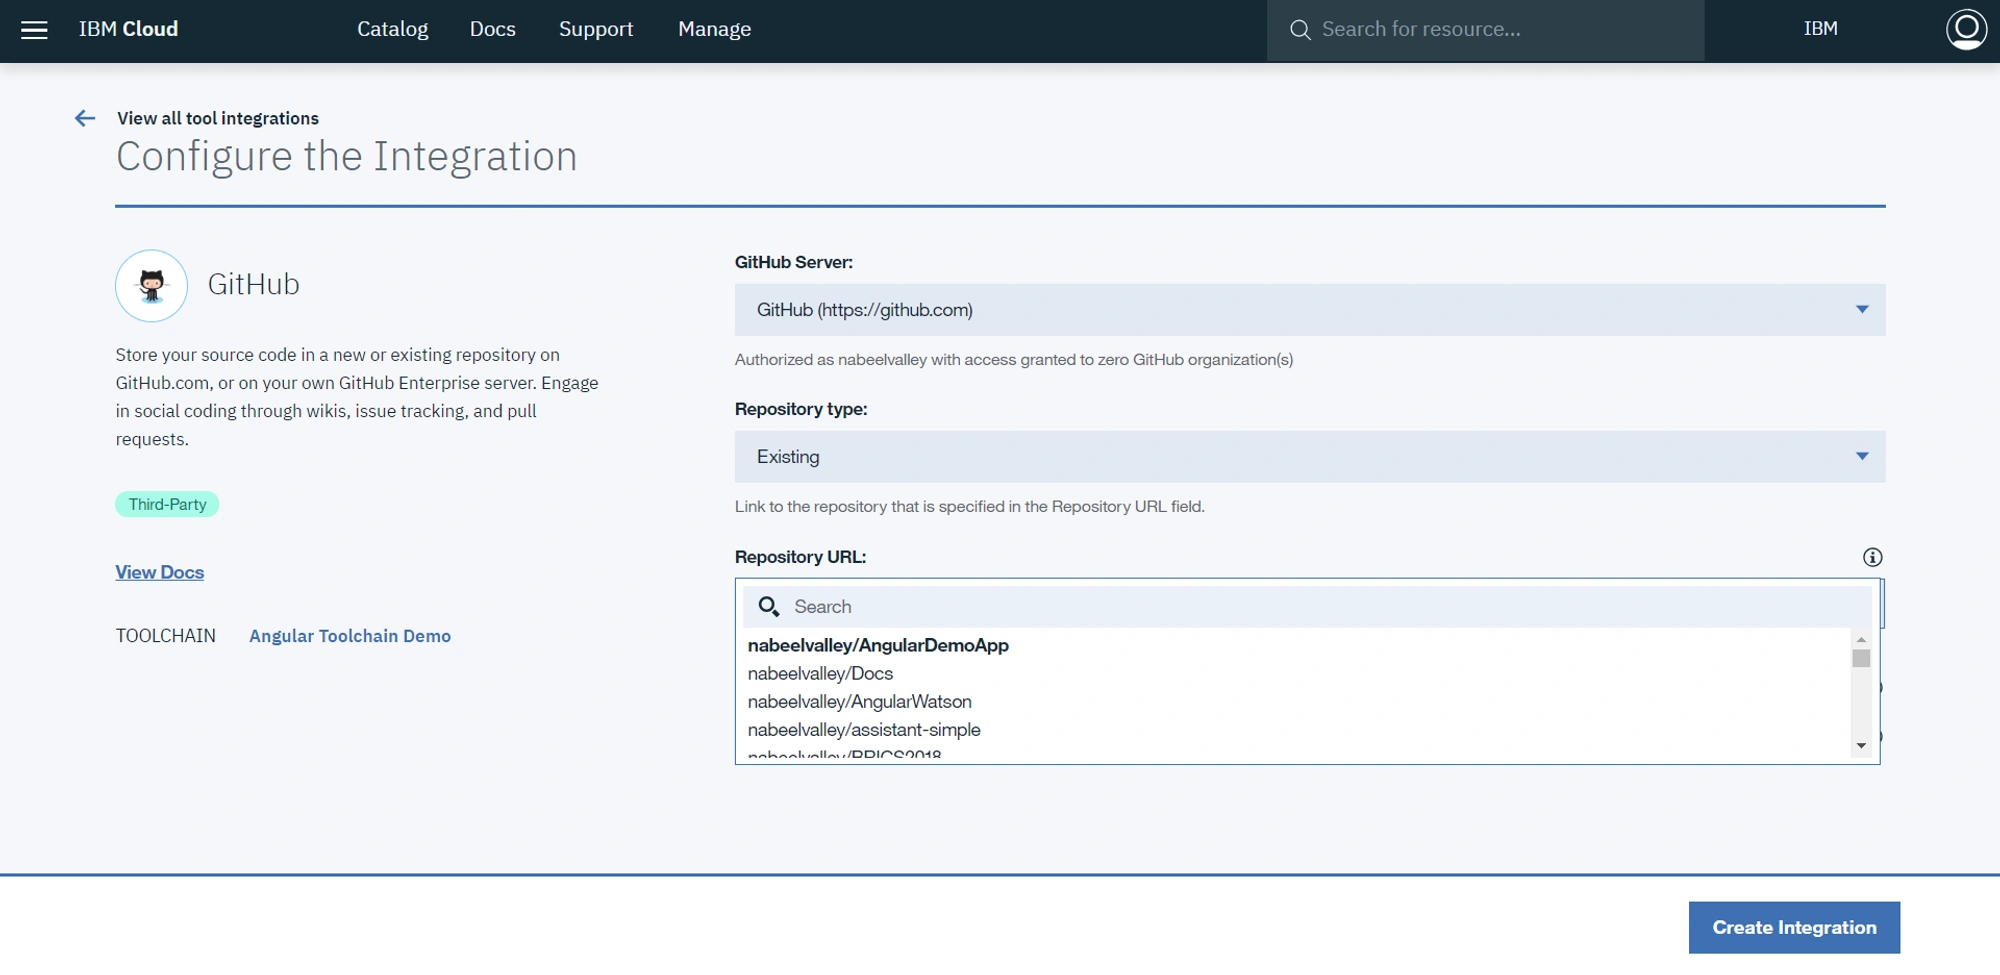
Next we will configure our integration by selecting our GitHub Server, in this case GitHub, then our Repository Type as Exisitng, then search for our Repository URL and select the one that contains the app we would like to deploy, in this case AngularDemoApp, then click Create Integration
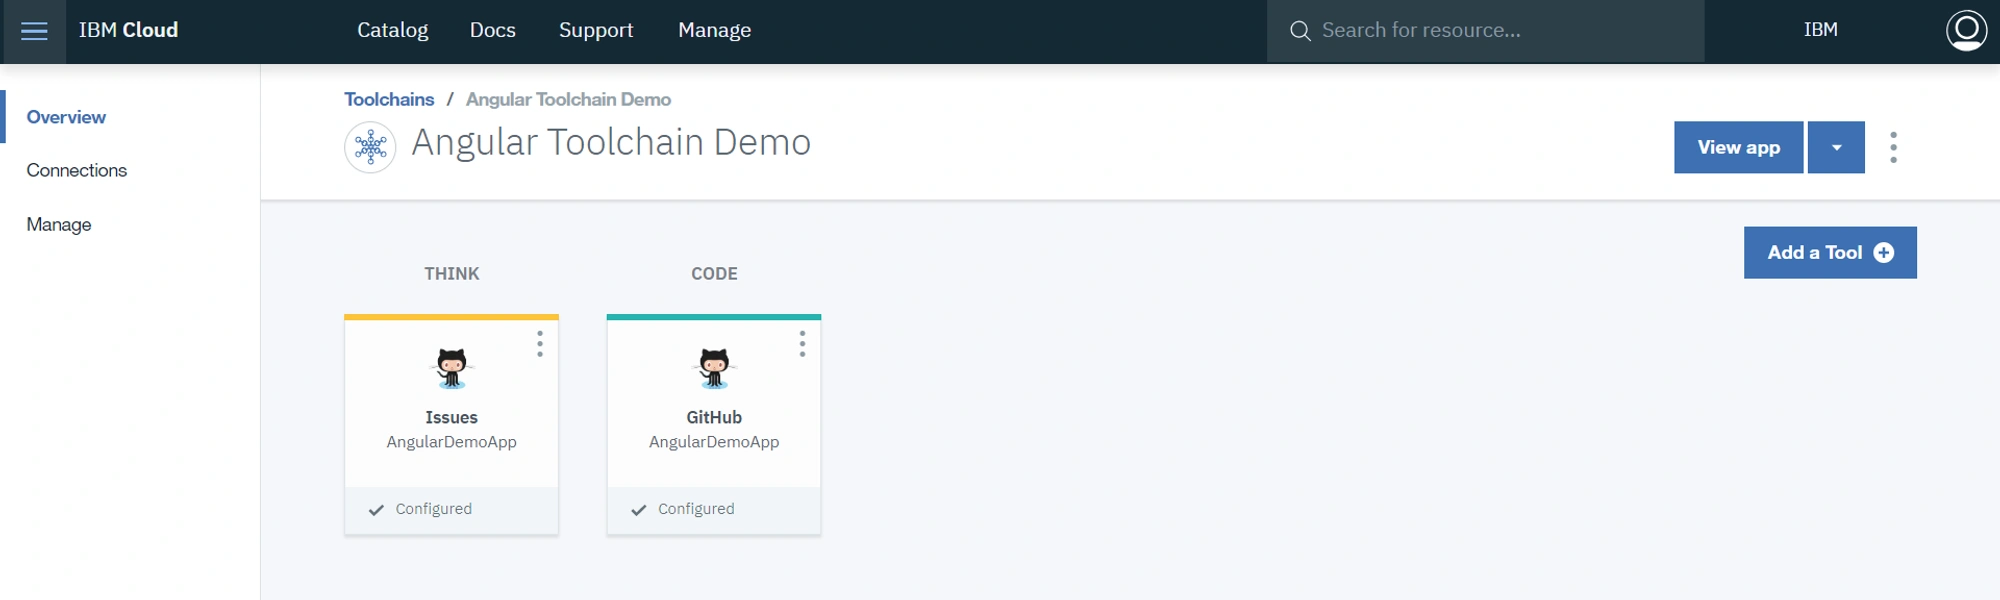
Upon creating our tool integration we will be directed back to our toolchain overviewwhere we can see the two tools that the GitHub integration has added, the Issues tool, and the GitHub tool
Next we will click on Add a Tool again to create a Delivery Pipeline
Creating a Delivery Pipeline
On the Add Tool Integration screen search for Delivery Pipeline, and create a Delivery Pipeline by clicking on the Delivery Pipeline option as shown below
This will direct us to the Tool Configuration page, in which we set our Pipeline Name, and click Create Integration
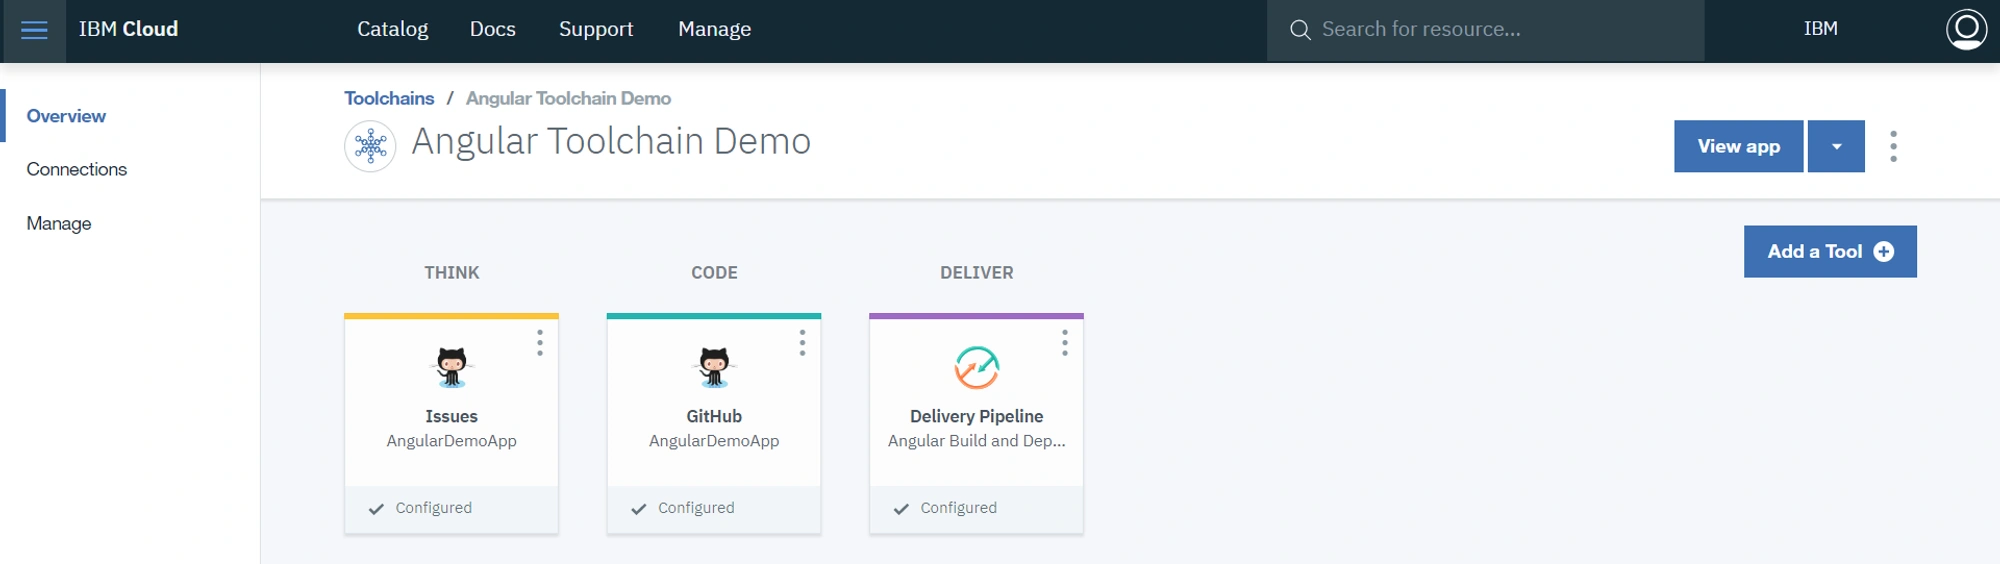
Once we have done that we will see Delivery Pipeline on our dashboard
Click on the Delivery Pipeline tool on the dashboard so that we can begin to set up the different stages of our pipeline
When we click on the Delivery Pipeline Tool we will be taken to our pipeline stages (which at this point has no stages) and we can click on Add a Stage
Build Stage
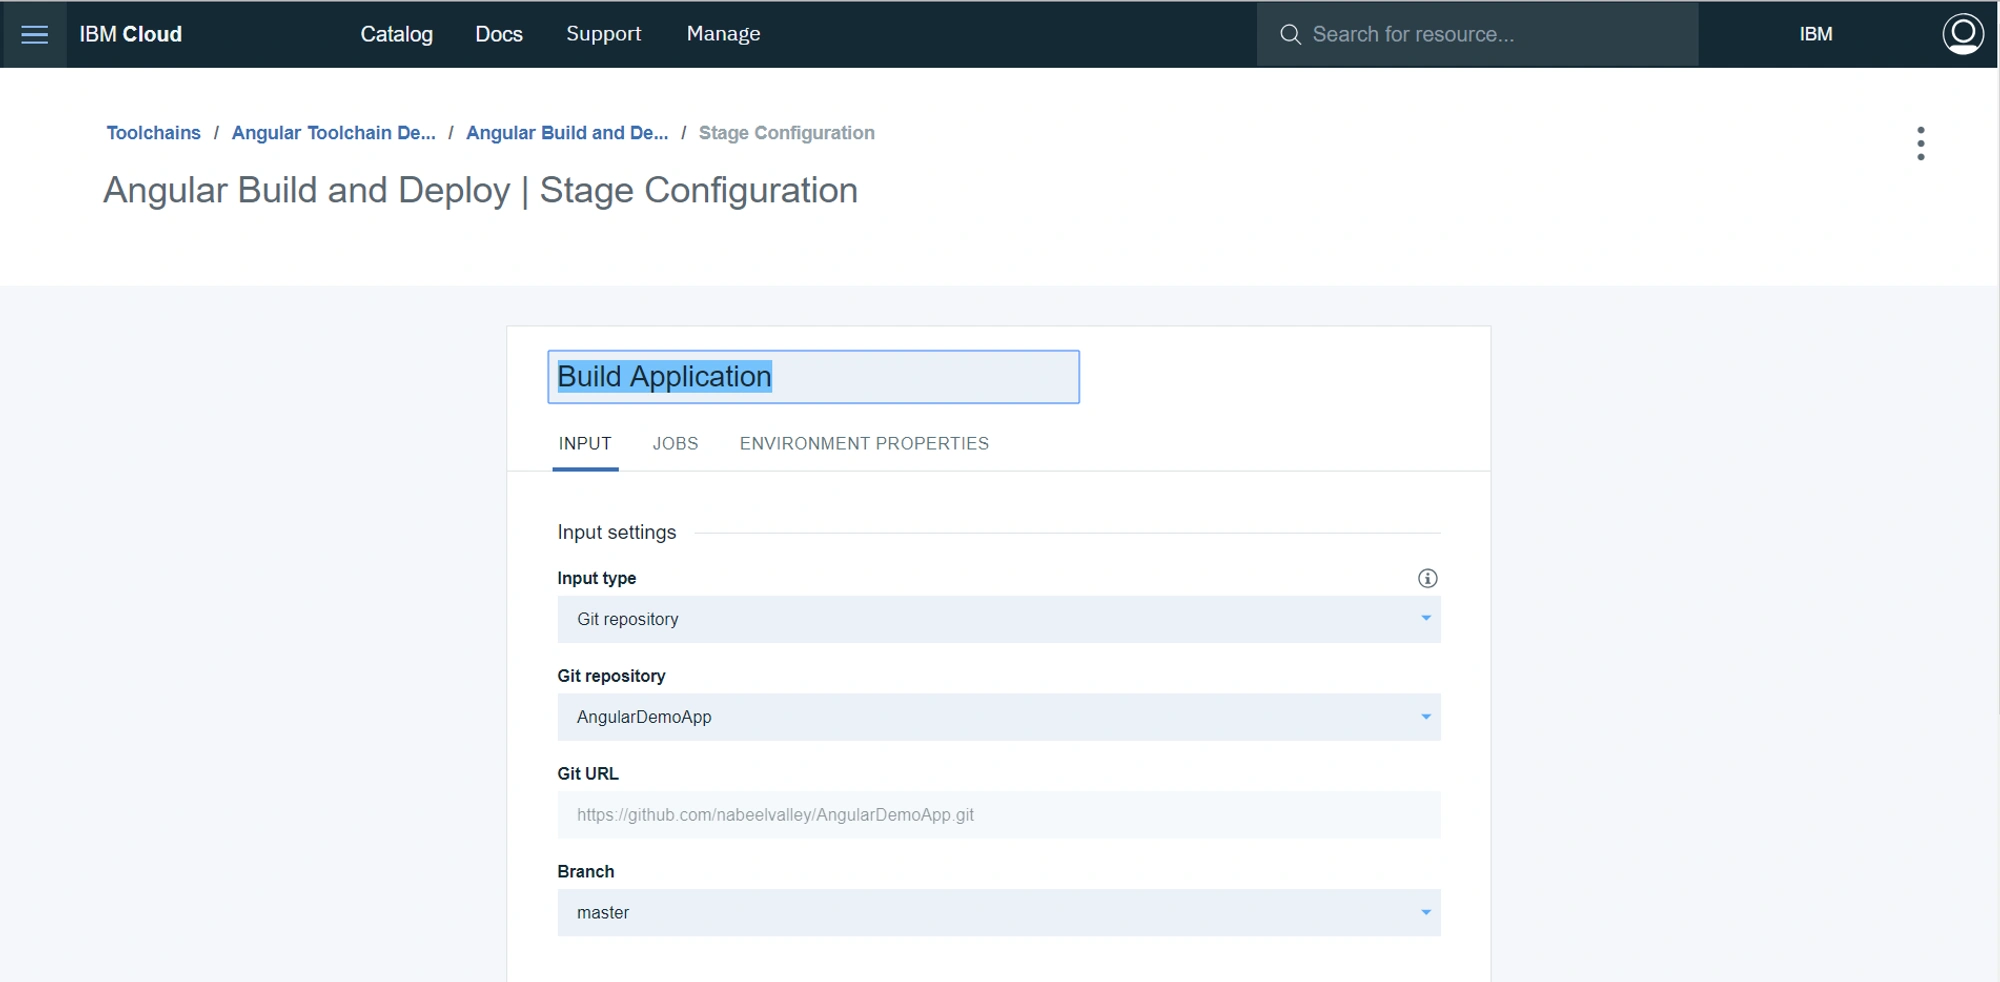
First we will add a stage for building our Application, we will name this stage Build Application, and set up our input. Select an Input Type of Git Repository, and ensure that the correct repository is selected, as well as the Master branch
Next scroll back up and click on Jobs then add a Build Job to our stage
And select our Builder Type as npm
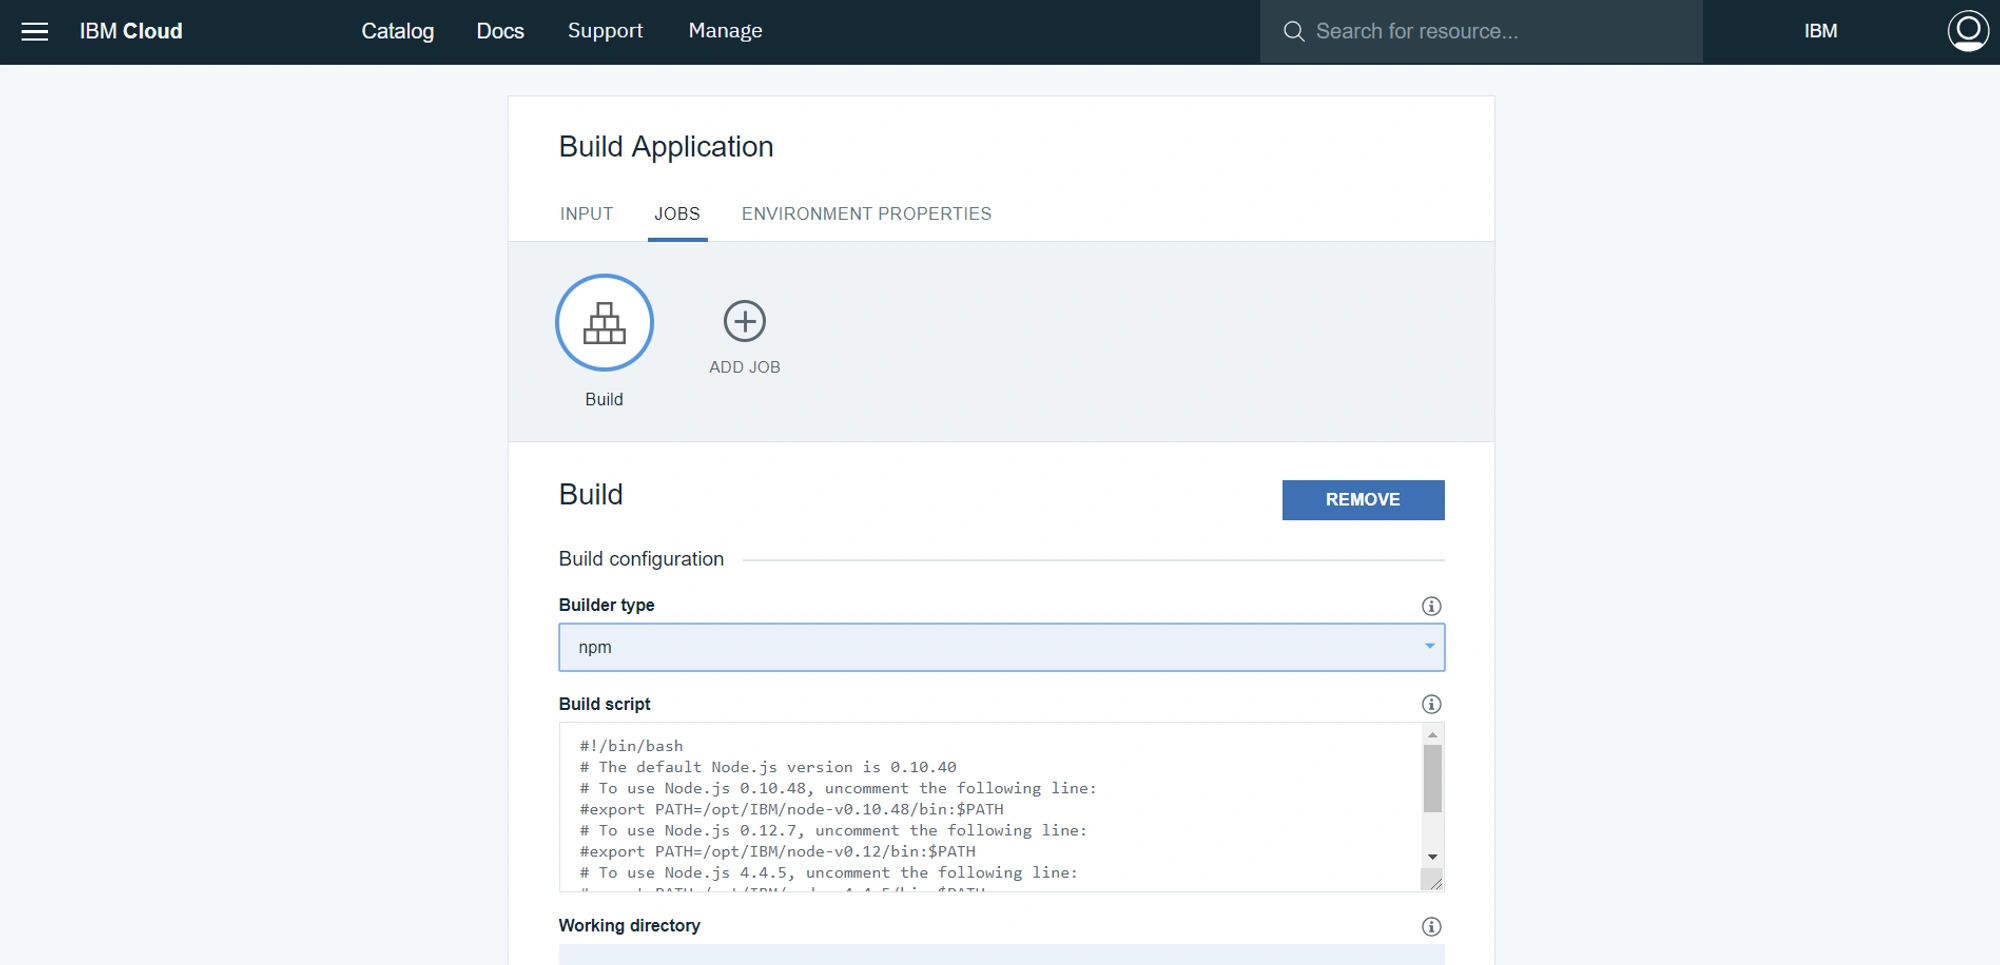
We also need to change our Build Script as is shown below, this will install the version of node that our application will need, install our app dependencies and do a production build for our application.
#!/bin/bash
export NVM_DIR=/home/pipeline/nvm
export NODE_VERSION=8.12.0
export NVM_VERSION=0.29.0

npm config delete prefix \
  && curl https://raw.githubusercontent.com/creationix/nvm/v${NVM_VERSION}/install.sh | sh \
  && . $NVM_DIR/nvm.sh \
  && nvm install $NODE_VERSION \
  && nvm alias default $NODE_VERSION \
  && nvm use default \
  && node -v \
  && npm -v

npm install -g @angular/cli
npm install

ng build --prod
If you would like to view an explanation of the general version installation process you can see that on Michael Wellner's Blog
Next we need to select the correct Build Archive Directory
dist/DemoApp
If you did not name your Application DemoApp then select your BuildArchiveDirectory with
dist/<YOUR APP NAME>
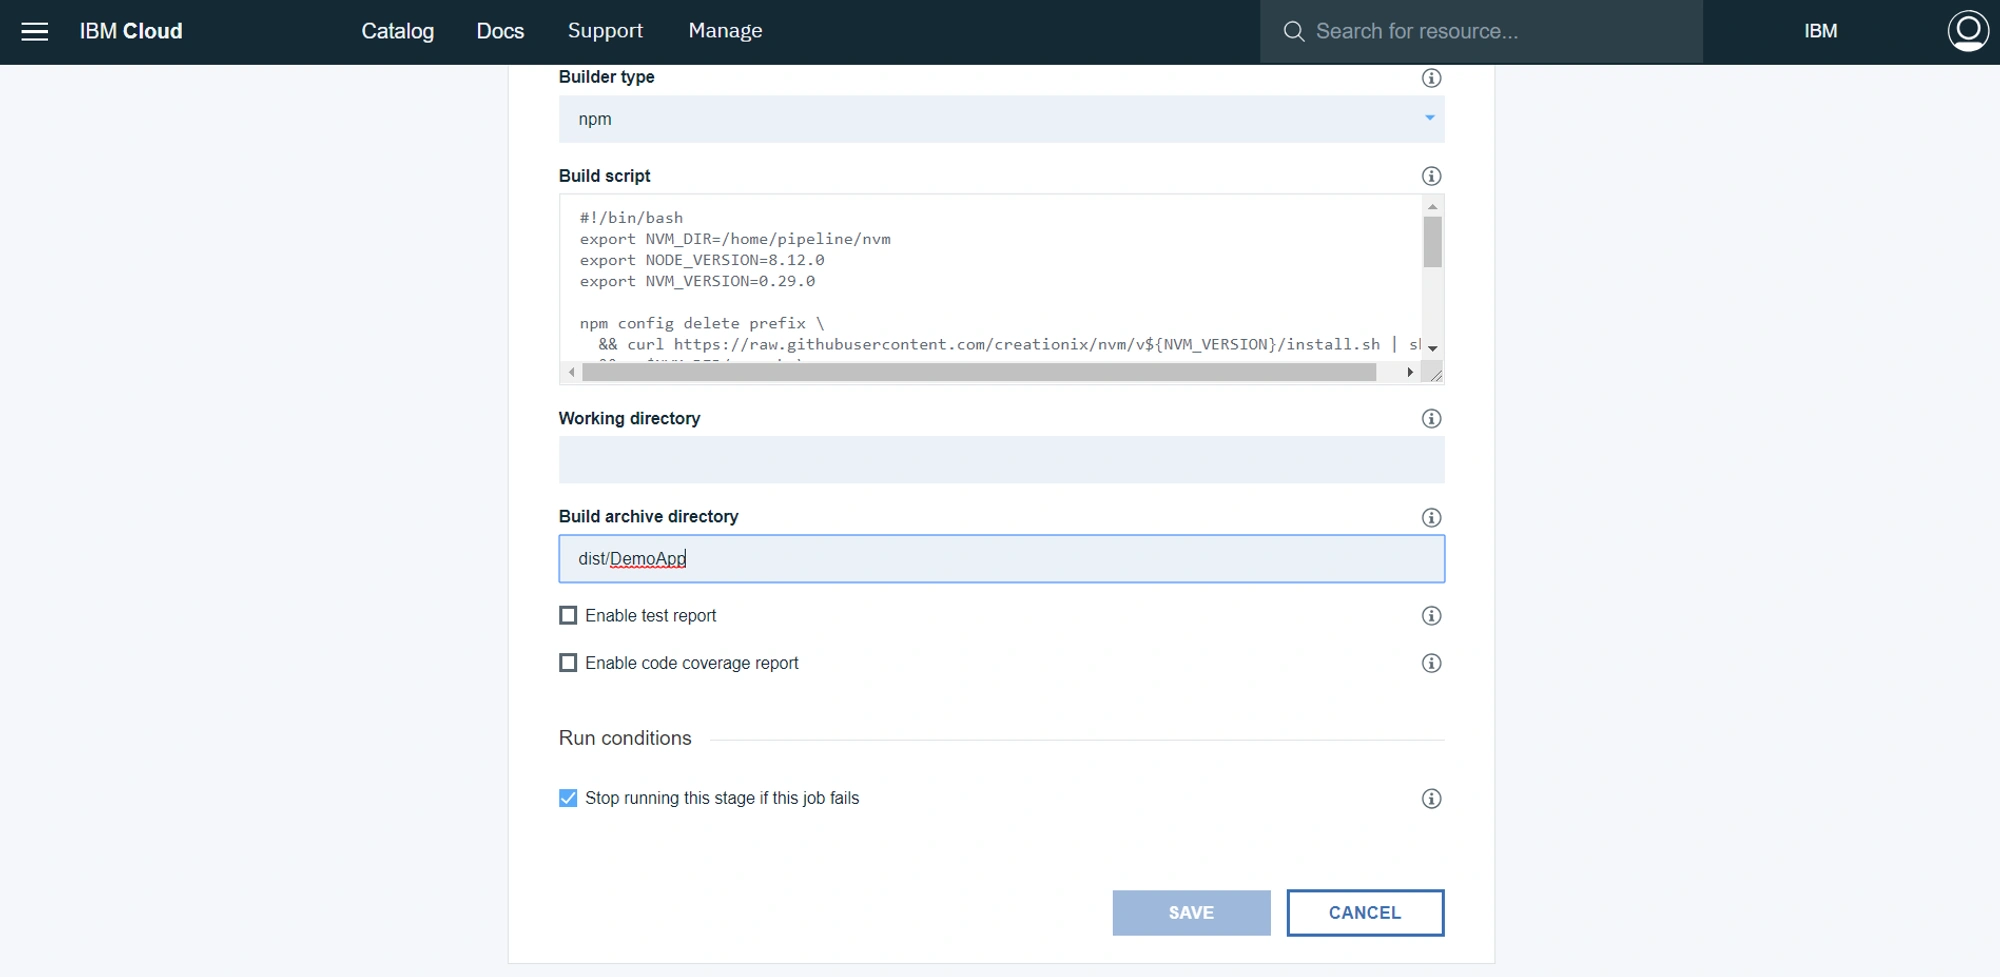
Once we are done with that we can click Save which will take us back to our Delivery Pipeline stage view
From here click Add a Stage to create a stage for deployment
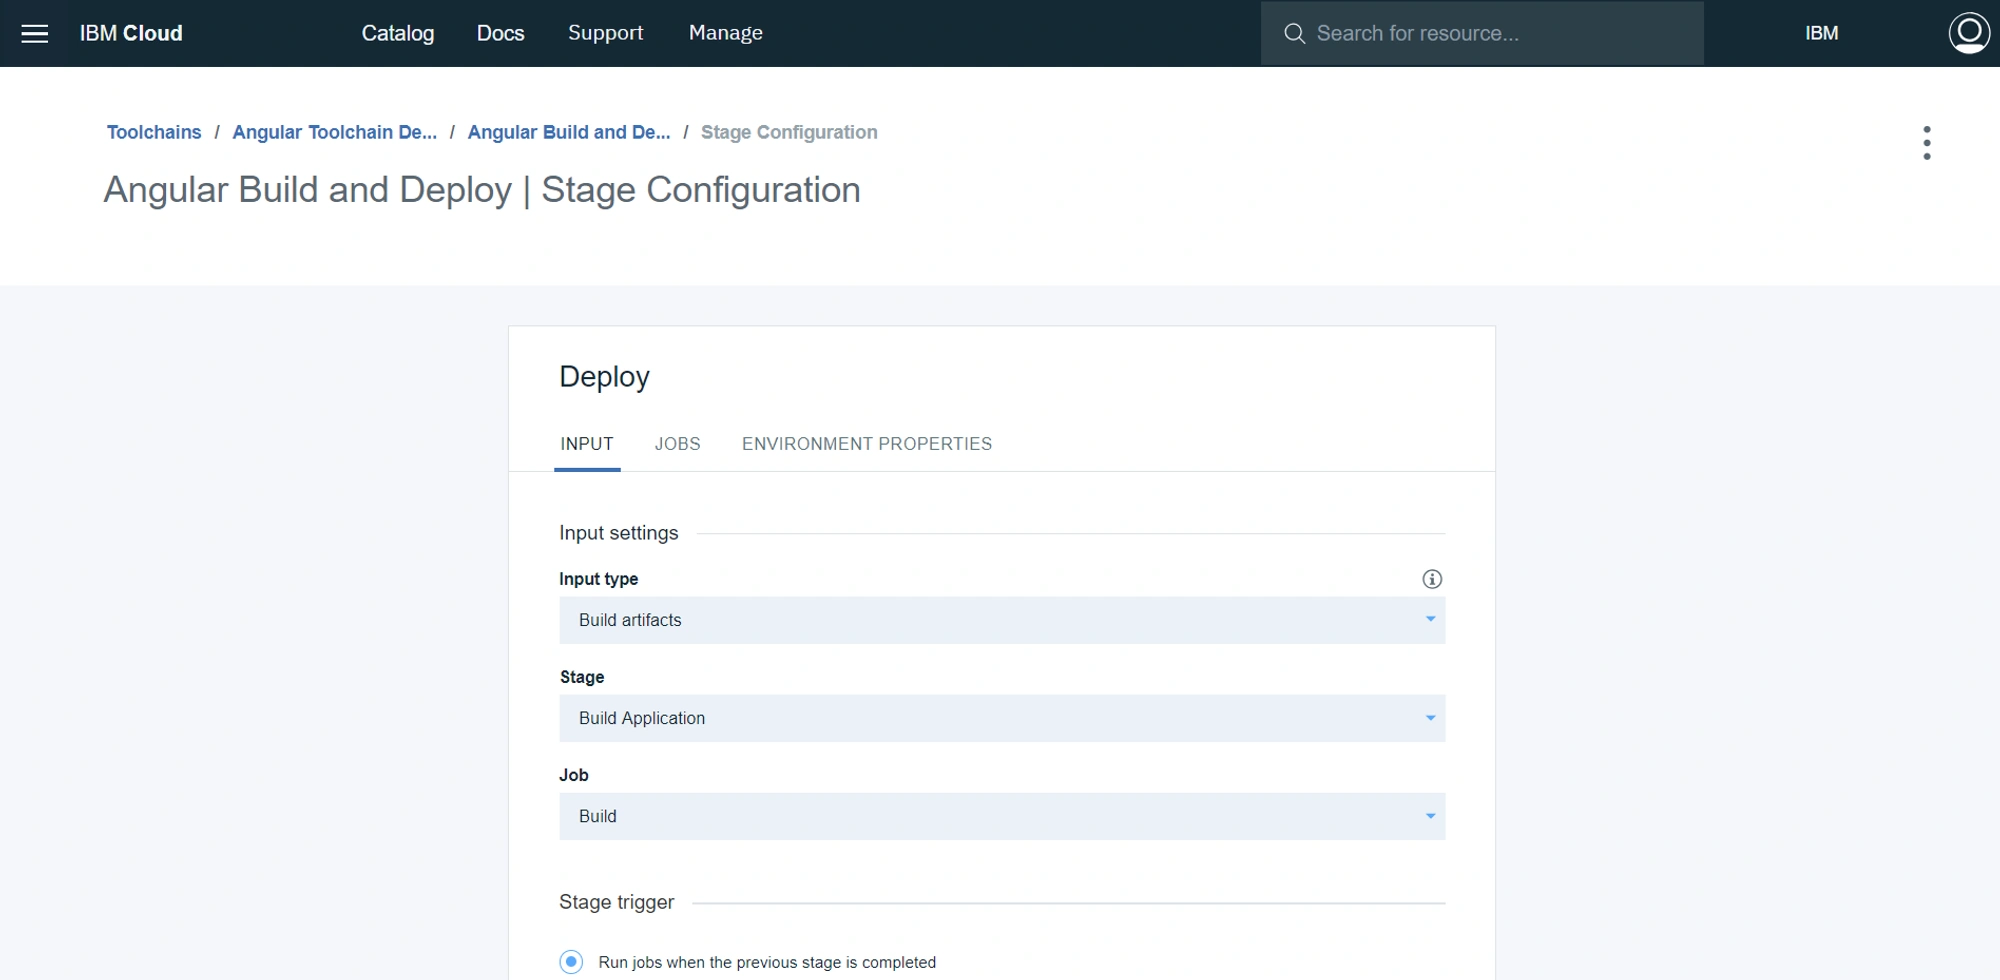
Deploy Stage
Rename our stage to Deploy and ensure that our Input Type is Build Artifacts, that the Stage is set to Build Application (or whatever we named our build stage), and the Job is the Build job from our previous stage
Click on the Jobs tab and add a Deploy Job then set our Deployer Type as Cloud Foundry, our IBM Cloud Region as the region in which our Organization and Space are located, our Organization, and Space in which we want our App Resource to be in, and then our Application Name for our Cloud Foundry Application
Lastly we need to set our Deploy Script. For this we will use the cf push command with the Static File buildpack as Angular Applications are built to a static web-page. Furthermore we use the --hostname option to set the route for our application as well as the --no-manifest option. The script we will use can be seen below. The hostname can be anything you like, this will be the route through which your application/website will be accessed
#!/bin/bash
cf push "${CF_APP}" --hostname <YOUR HOSTNAME> --no-manifest -b 'https://github.com/cloudfoundry/staticfile-buildpack'
If we would like to restrict the memory usage of our application we can use the -m flag as follows:
#!/bin/bash
cf push "${CF_APP}" --hostname <YOUR HOSTNAME> --no-manifest -m 256M -b 'https://github.com/cloudfoundry/staticfile-buildpack'
Once that's done we can click Save which will take us to our Delivery Pipeline Stage view
The App Manifest allows us to set our application configuration via a manifest file as opposed to via the CLI, you can find more information about Cloud Foundry Manifests here
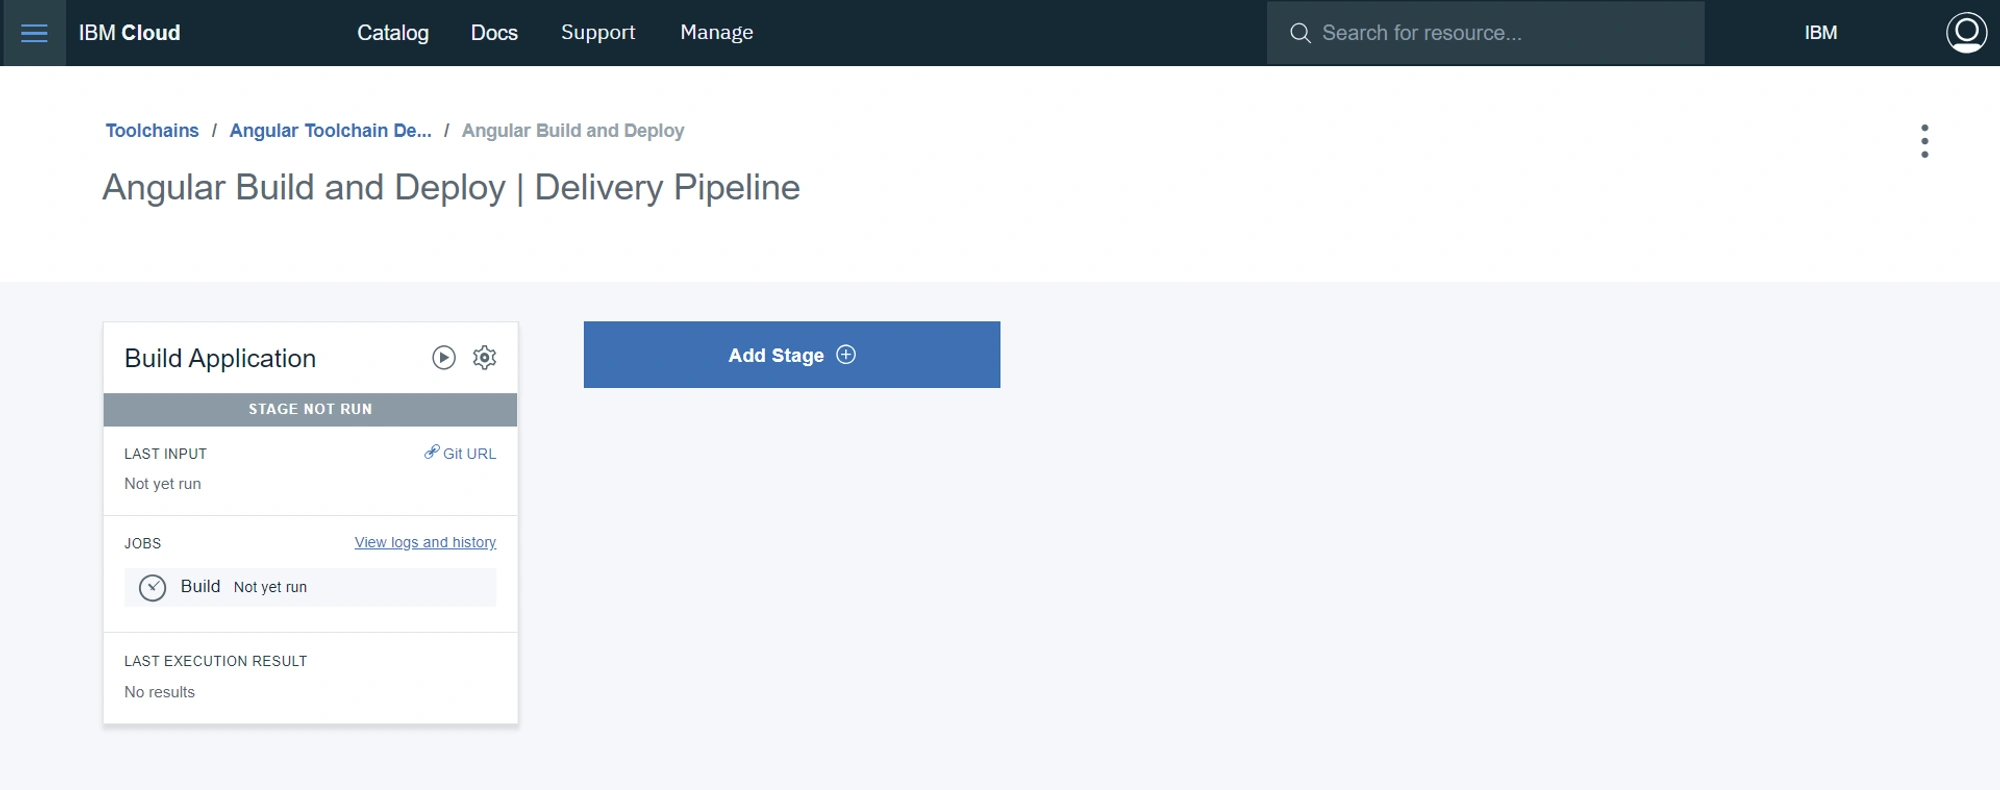
Doing a Deployment
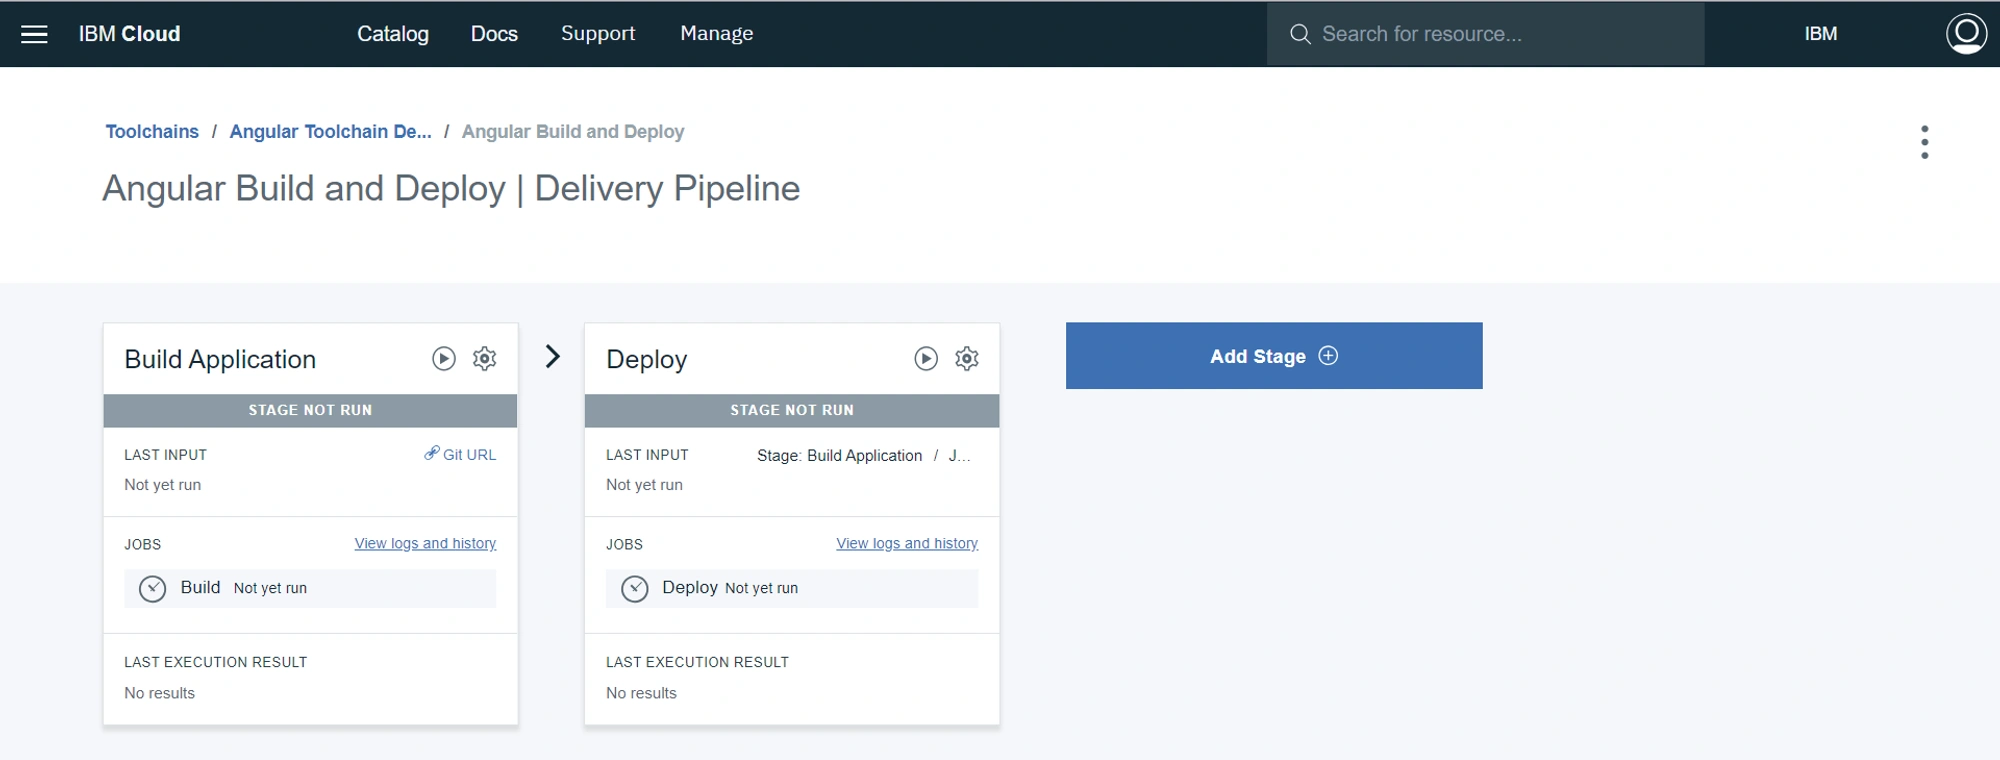
We run our Build Application stage via the Play Button at the top right of the card, this will in turn trigger the Deploy Stage once it has completed
When our Build and Deploy have completed successfully we will see the following
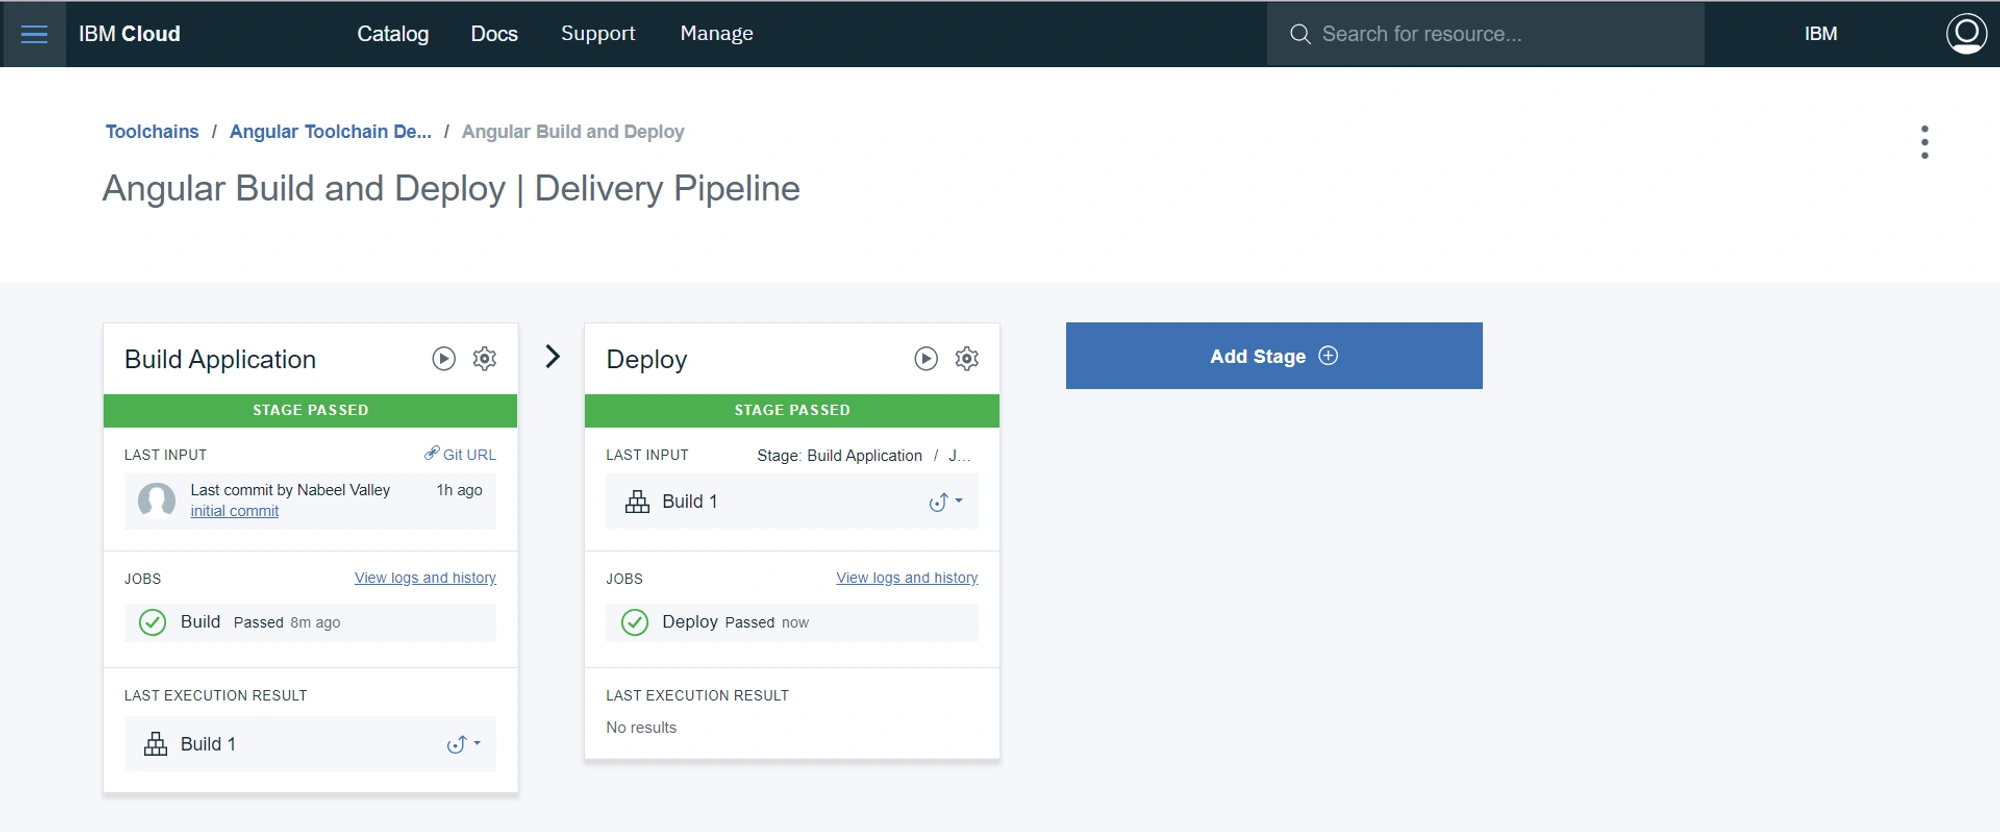
If the stages are red this means that one of them have failed, we can view the logs by clicking on the Build or Deploy Stages or clicking on View logs and history, this will allow us to troubleshoot any issues we may have encountered in either of our stages
Note that as we update our application master branch GitHub our Build and Deploy stages will be run automatically
View our Application
We can navigate to our IBM Cloud Dashboard via the hamburger menu at the top left or by clicking on IBM Cloud in the Menu Bar at the top of the screen, here we will see our newly created application
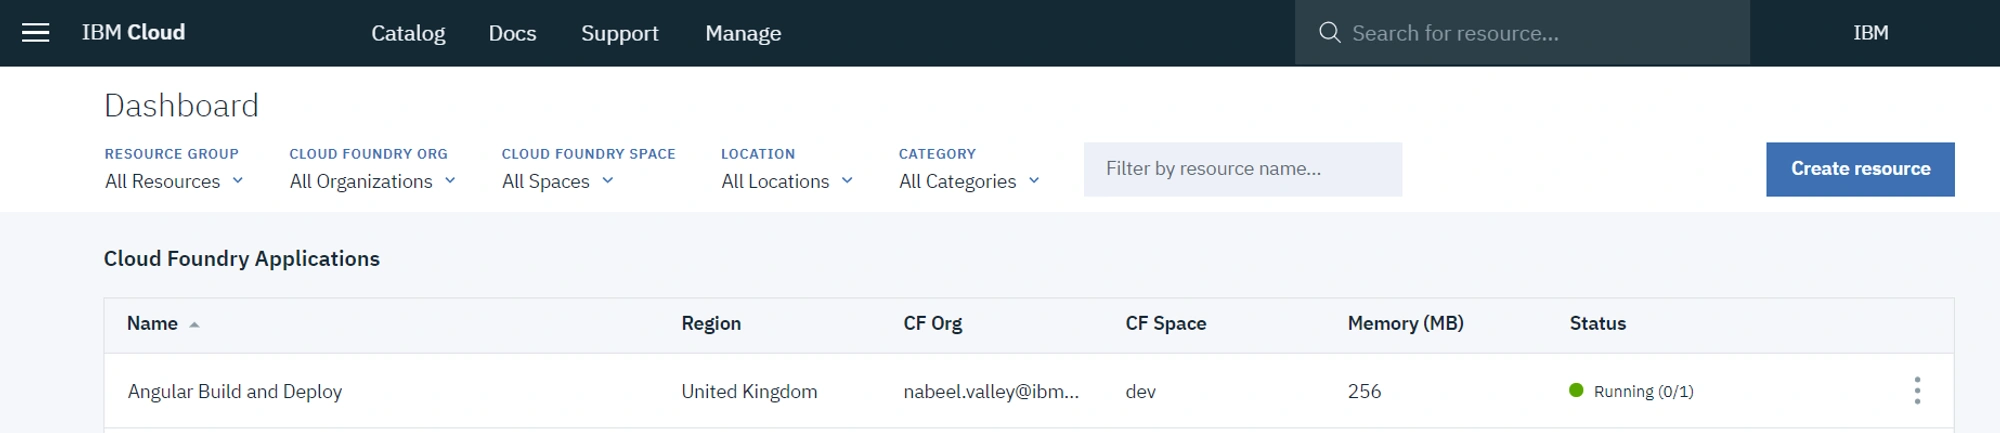
We can click on our application to get to the application screen where we can view our application information as well as modify the number of Instances or Instance Memory as well as other information about our application from the menu on the left
Lastly we can open our Application Site via the Visit App URL link at the top
And you're done! You have successfully built and deployed an Angular Application with IBM Cloud DevOps